 Laptop & Tablet Parts
 Desktop & All-in-one Parts
 Dell Server Parts


In this Dell laptop tutorial we are going to show you how to format a Hard Drive. These installation instructions have be made into 7 easy to follow printable steps. We have also created a video tutorial that shows you how to Format your Hard Drive.
Before you begin
 Please take the time read the following safety guidelines when working on static sensitive electrical components.
Dell repair manual service precautions
Video tutorial repair manual
Installation and Removal Instructions
Format Hard Drive
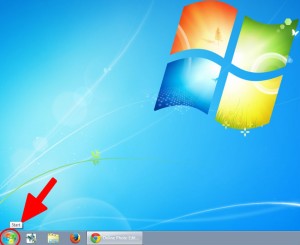
Step 1
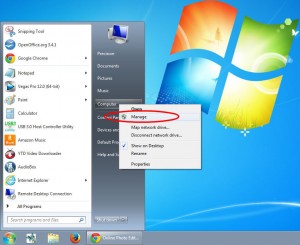
- Click the Start button.
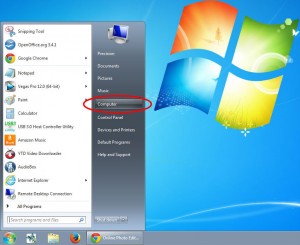
Step 2
- Right click Computer.
Step 3
- Click on Manage.
Step 4
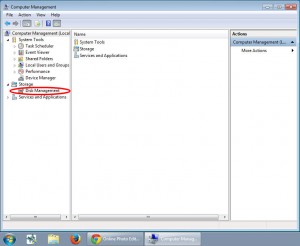
- In the left pane, click Management.
Step 5
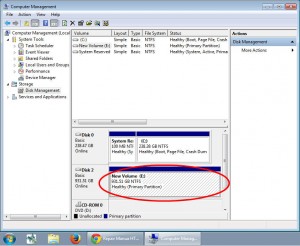
- Right click on the volume you want to format.
Step 6
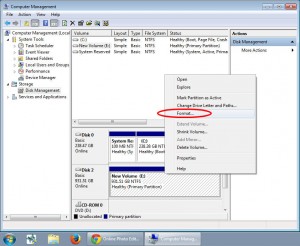
- Click on Format.
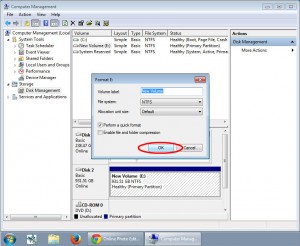
Step 7
- To format with the default settings click OK, and then click OK again (Note: The Perform a quick format option will create a new file table. It does not overwrite or erase the volume).