In this Dell laptop tutorial we are going to show you how to install and replace the Heatsink Fan Assembly on your Latitude 7310 laptop. These installation instructions have been made into 9 easy to follow printable steps. We have also created a video tutorial that shows you how to install your Latitude 7310 Heatsink Fan Assembly.
Before you begin


Dell repair manual service precautions
Tools needed for this laptop repair
- 1 x Phillips #0 screwdriver
- 1 x small plastic scribe
|
|
DIY Discount - Parts-People.com offers 5% off to all DO-IT-YOURSELFERS!
Use this coupon code to save 5% off these parts DIYM514
|
Installation and Removal Instructions
Latitude 7310 Heatsink Fan Assembly


Step 1
- Before you begin: If you need help at any point, you can always contact Parts-People Repair Department for help with your diagnosis or repair.


Step 2
- Unscrew the Bottom Base Cover (8 x captive screws).
- Use a plastic scribe to pry apart and remove the Bottom Base Cover.
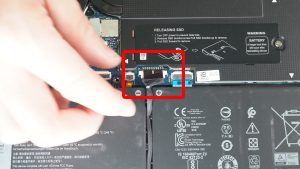

Step 3
- Disconnect the battery cable.
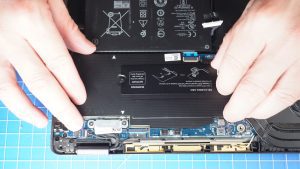

Step 4
- Remove the heat shield.
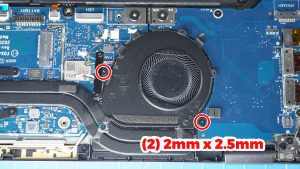

Step 5
- Unscrew the Cooling Fan (2 x 2mm x 2.5mm).
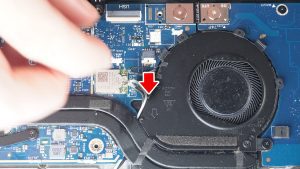

Step 6
- Disconnect the cooling fan cable.
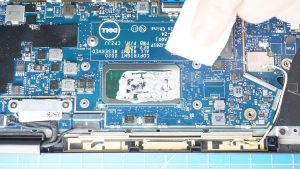

Step 8
- BEFORE REPLACING HEATSINK: Wipe away any old thermal paste from the CPU and heatsink.
- ***NOTE: Make sure to not touch the heat transfer areas on the heatsink and processors. The oils on your skin can reduce the heat transfer capability of the thermal paste.
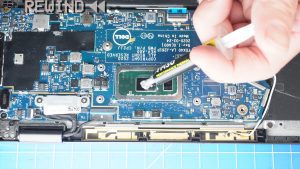

Step 9
- Apply a small amount of new thermal paste to the processors.
- ***FOLLOW THE ORIGINAL STEPS IN REVERSE TO REASSEMBLE YOUR LAPTOP.
|
|
DIY Discount - Parts-People.com offers 5% off to all DO-IT-YOURSELFERS!
Use this coupon code to save 5% off these parts DIYM514
|

 Laptop & Tablet Parts


